This how-to will step you through generating a certificate signing request (CSR) in IIS. These procedures were tested in Windows 10 on IIS 10, but will also work in IIS 7.x and 8.x.
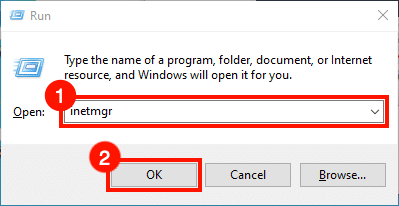
Start IIS Manager. One quick way to do this is by opening the Run command, then typing inetmgr and clicking the OK button.
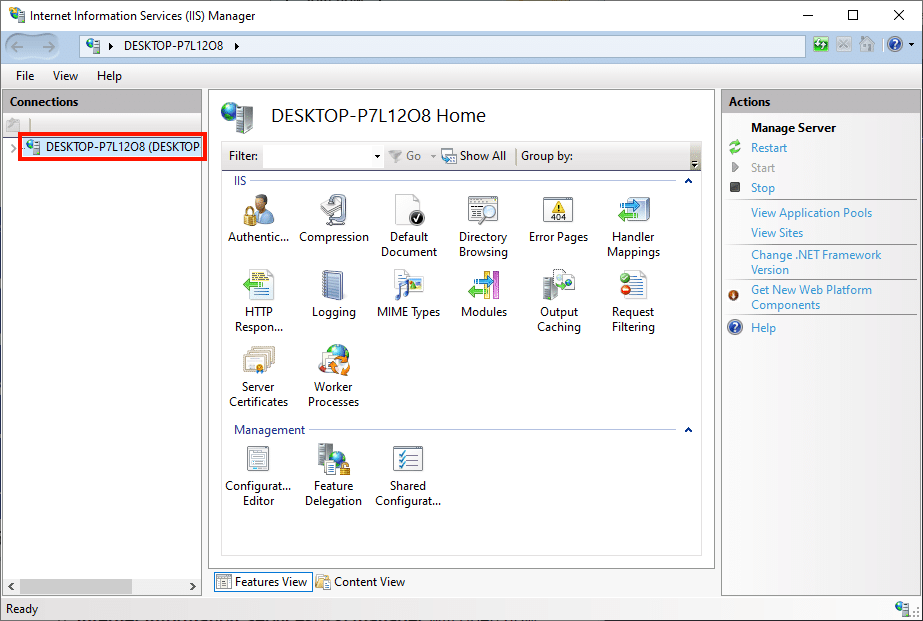
Select the server in the Connections pane, on the left side of the window.
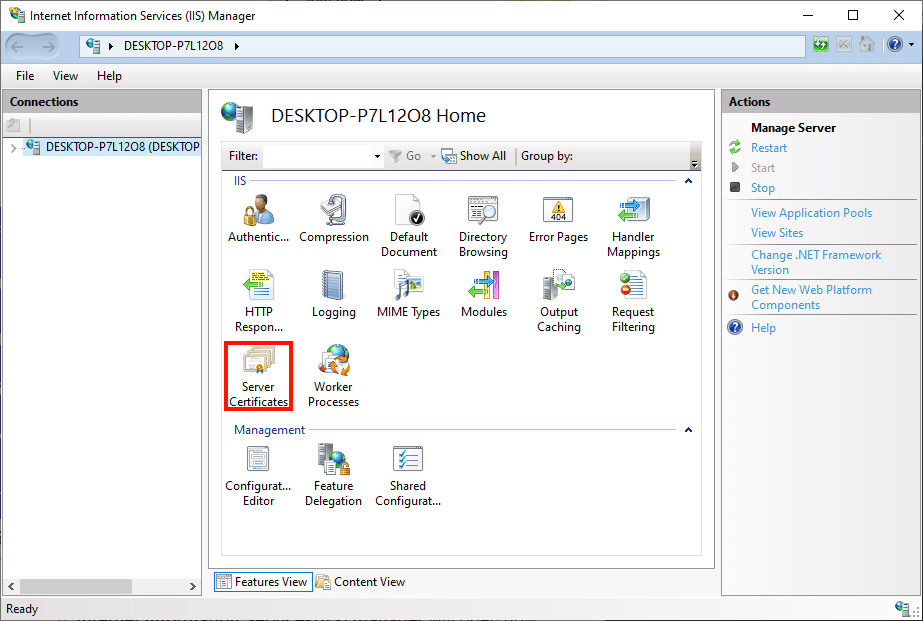
Double-click the Server Certificates icon, located under IIS in the center pane of the window.
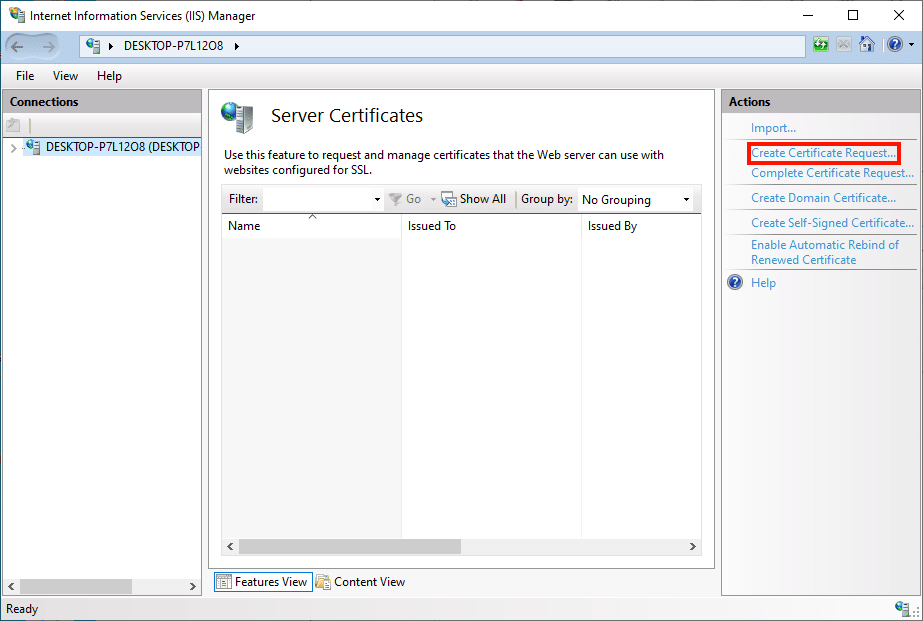
Click the Create Certificate Request… link, in the Actions pane on the right side of the window.
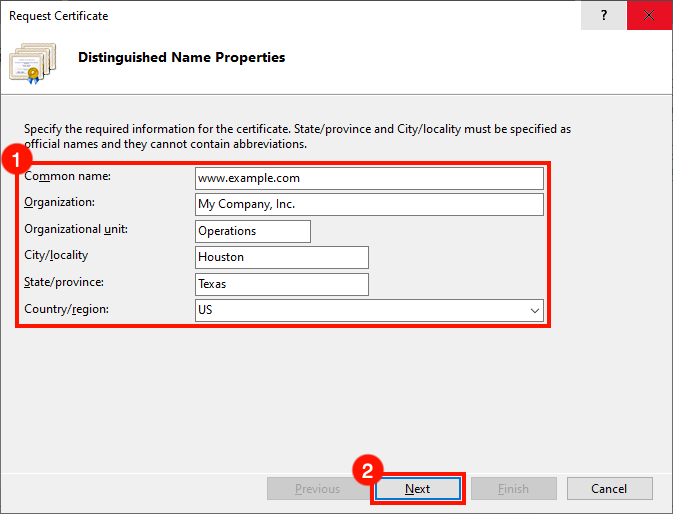
The Request Certificate wizard will open. Fill out the Distinguished Name Properties form with the following information:
• Common Name: The hostname that will use the certificate. This is usually a fully-qualified domain name, like www.mydomain.com, or store.mydomain.com. You can also use a wildcard, like *.mydomain.com.
• Organization: The legal name of your company or organization.
• City/locality: The city where your company is located.
• State/province: The state where your company is located.
• Country/region: Please use the two-character abbreviation for your country.
When you are finished filling out the form, click the Next button.
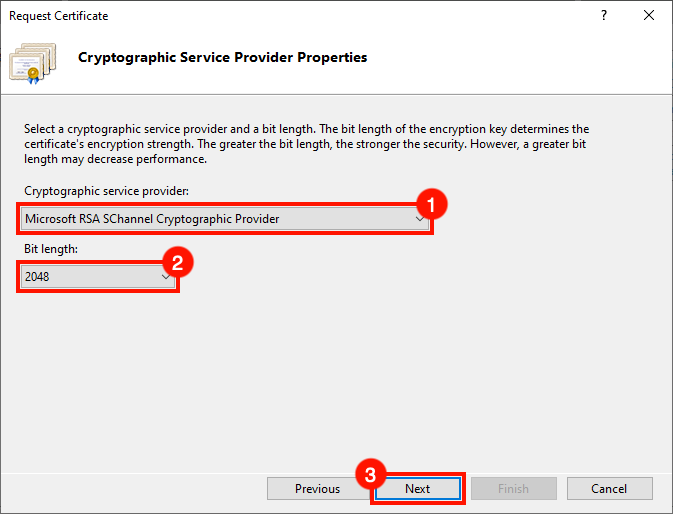
Next, set the Cryptographic Service Provider Properties. Use the drop-down menus to select Microsoft RSA SChannel Cryptographic Provider as the cryptographic service provider, and a bit length of 2048 (unless you have a reason to set these to other values). When you are finished, click the Next button.
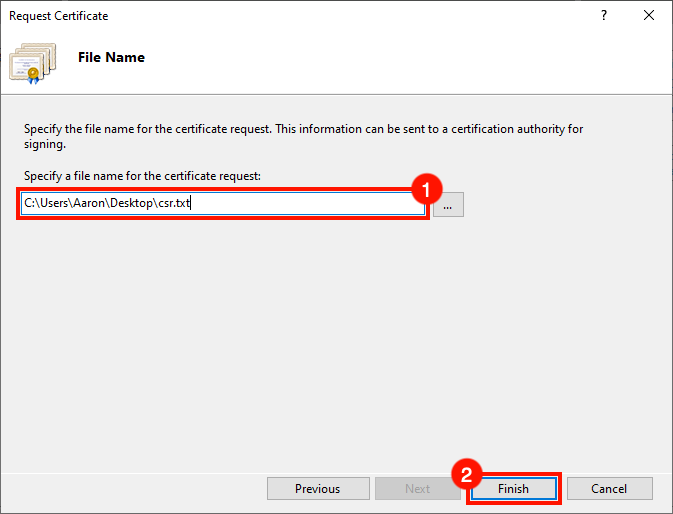
Create a file name for your CSR, then click the Finish button.
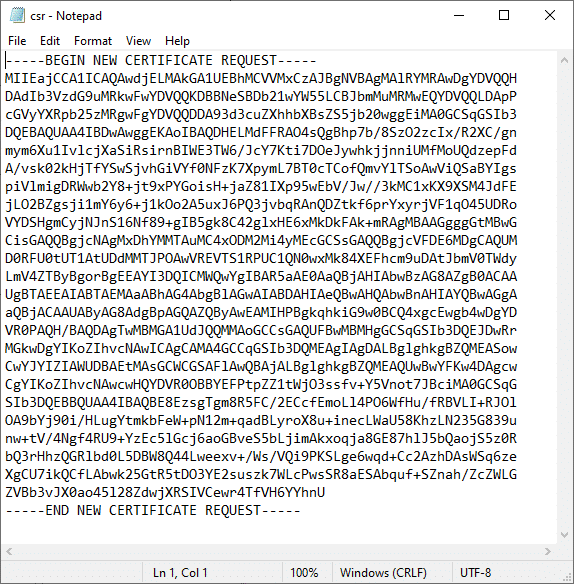
You’re finished! Open the CSR in a text editor when you are ready to submit it to SSL.com for signing. For instructions on submitting your CSR to SSL.com, please read our guide to CSR submission. When you’re ready to install your certificate, please see these how-tos on installation and binding in IIS.