Apple Mail is the default email client that comes with every Mac using OS X 10.0 or later. This guide will show you how to configure your Apple Mail application to access email for your Indichosts.net server.
This article is for Mail version 8.1 on Yosemite (OSX 10.10.X). Your version of Apple Mail may vary depending on the version of Mac OSX you are running.
Before you start, be sure to have these handy:
- Your domain name: example.com
- Your email address: [email protected]
- Your email password.
- Your access domain (server hostname).
Let's begin!
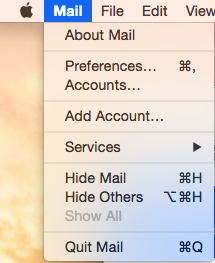
- Open Mail. If you haven't added a new account yet, you'll be taken directly to the Add Account prompt. If you're adding an additional account, or this prompt doesn't otherwise load automatically, you'll need to select Add Account from the Mail menu.
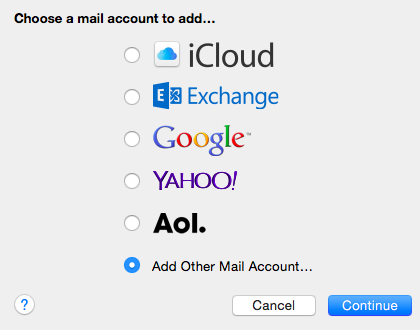
- From the Add Account prompt, select Add Other Mail Account... and click Continue.
- Enter your email account information.
- Full Name: Your name as you would like it to appear.
- Email Address: Your full email address.
- Password: The password for your email account.
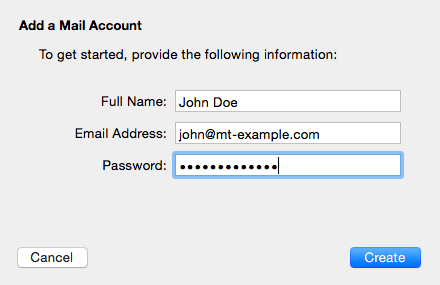
Click the Create button when you're ready.
- Mail will attempt to contact the mail server. The default search uses "autodiscover.example.com" -- unless you have this subdomain already created and an SSL Certificate installed, this will not work. However, don't worry! It's totally normal for this to happen, since Indic-hosts's servers do not have autodiscover settings enabled by default.

When an autodiscover setting has been unsuccessful, an "Account must be manually configured" message will appear. Click the Next button to complete setup manually.
- Next, enter your incoming mail server information.
- Account Type: We strongly recommend connecting via IMAP.
- Mail Server: Your server hostname.
- User Name: Your full email address.
- Password: The password for your email account.
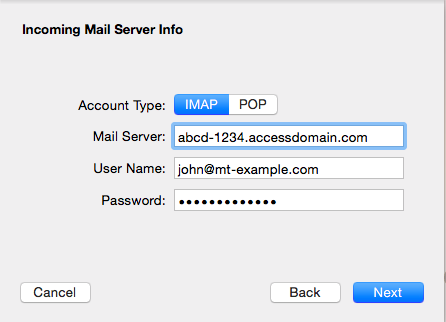
- Click the Next button to proceed. You will be taken to a second screen to confirm additional details.
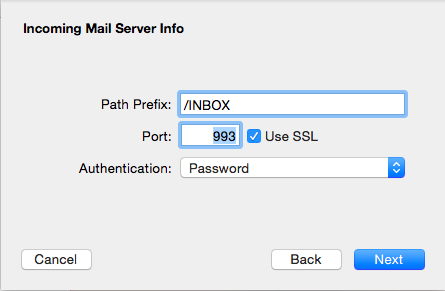
- Next, we'll configure the Outgoing Mail Server.
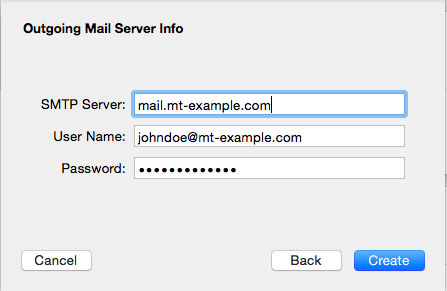
- SMTP Server: Your server hostname
- User Name: Your full email address.
- Password: The password you assigned to the email account.
- Click the Create button when you're ready.
- Your email account has been created, but you'll want to verify a few steps before you get started. Select "Preferences" from the Mail menu, and click on the "Accounts" tab from the Preferences window.
- Select your new account from the left hand column.
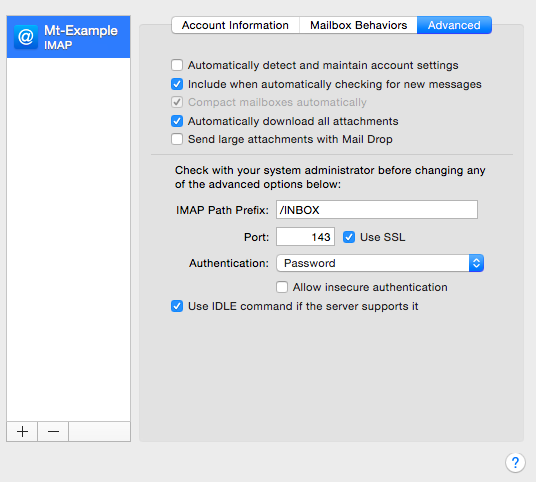
- Click the "Advanced" tab and uncheck the box to "Automatically detect and maintain account settings."
- Navigate back to the "Account Information" tab. This time, select Edit SMTP Server List... from the Outgoing Mail Server (SMTP) drop-down menu.

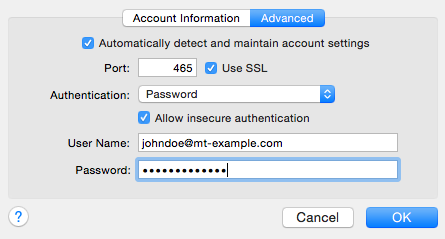
- You will be taken to the SMTP server list. Click the Advanced tab and verify the following settings:
- Be sure the box to "Automatically detect and maintain account settings" is not checked!
- Enter your desired outgoing mail port. Since many ISPs block port 25 (the default outgoing mail port), we strongly suggest using port 587, or port 465 if SSL is enabled.
- Select "Password" from the Authentication drop-down menu, and make sure the "Allow insecure authentication" box IS checked.
That's it! You just configured your email address on Apple Mail.


